
By Luke Menard
We are now well past the three-month mark on our time here in Sri Lanka. Surprisingly, some aspects of our experience already feel as though they are beginning to wind down. Whenever we have internet access, you’re sure to find us frantically applying for jobs (resumes available upon request!) that will keep us off our parents’ couches upon our return stateside. And our fellow sameekshanya, Chandni, leaves us in a mere few weeks, plentiful ethnographic data in hand. At the same time, however, new projects seem to crop up and build momentum on a daily basis. We’ve constructed a new vegetable garden full of pumpkins, carrots, okra, beans, and tomatoes that have just started to germinate. We’ve propagated and transplanted countless bananas, dill, krotons, and mukunu waena throughout our ornamental garden zones. And while this work booms, still other things seem to move along at the same steady pace. The plants and trees, helped along by our offerings of water and compost, continue their relentless conversion of carbon dioxide into oxygen and sugar as they extend tirelessly towards the sun.
The last month and a half has seen a flood of progress on what will eventually be the research station’s new tea garden. While Chandni seems to have befriended every man, woman, child, and dog in Pitakele and Jo has learned to identify the call of every winged creature on the island, Tillakaratne and I have toiled in the sun, preparing the steep slope adjacent to the research station to hold 1,500 young tea plants. The work has been extremely demanding. I often find myself completely drained, covered in dirt, sweat, and soil after a long day’s effort. Tillekaratne has even taken to calling me “Ala” (potato) because of my tendency to finish each day covered head to toe in soil, as if I were freshly plucked from the earth.
Considering what I assume to be an extremely outdoors-inclined audience, I’m sure I don’t need to preach how rewarding getting your hands dirty and reconnecting with the soil can truly be. But, I will say that if you’re looking to perfect your beach body in time for spring break, I highly recommend constructing a smallholder tea plantation in traditional Sri Lankan style as a productive, alternative workout routine that you can do in your own backyard!
Now that site prep is complete, I’ll use this blog post to discuss everything we’ve done to alter and ready the tea slope to date. One product that I hope to generate from my work is a short guidebook that discusses planting and production methods on smallholder tea gardens in Sri Lanka and beyond. Since I have a captive audience, I’ll take the opportunity to informally sort my thoughts and notes here in an (hopefully) interesting way. Thank you for once again being my guinea pig, dear reader.
Step 1: Seek the Help of a Local Expert – In many ways, my experiences in Pitakele will boil down simply to a source of compelling stories that I’ll be able to tell my friends and family well into the future. The dirt currently covering my arms and legs will serve largely as a prop for an Instagram-worthy photo collection that I can pull out and show off in an attempt to revitalize lagging conversation at a dull party. My impact here will be mostly ephemeral, but my effect on a relatively small patch of Sri Lankan soil will be lasting. So, I want to be sure that I get it right.
While for me, the effort I put into this tea garden will eventually be just a rewarding memory, this work is a source of income and a way of life for many of the people of Pitakele. This type of agroforestry is old, lasting, and sustainable. The understanding of how to piece together the cogs and wheels of this complex system are passed through generations, fine-tuned and amended as a daughter learns from her mother how to nurture and find sustenance from the plants on their land and adds her own unique expertise to a living body of knowledge.
Tillekaratne is truly an expert of this craft. While this project is my baby, it is certainly his brainchild. He has a comprehensive understanding of the best practices for preparing, planting, and maintaining a functioning tea garden. He is familiar with the local tea market and knows exactly where to find the numerous plants we need at a good price. And while not the most talkative I think my terrible Sinhala deeply frustrates him from time to time. In fact, in lieu of wasting the energy it takes to utter words he knows I won’t understand, he often instead resorts to simply throwing the tool he wants me to use at the location he wants me to use it. He is an excellent teacher, nonetheless. I find myself watching him work, often marveling at his ingenuity and doing my best to soak in and replicate the ways he manipulates the land. Each day I work with him, I go to bed reflecting on every new skill that I learned, pleased with how much we were able to accomplish.
If you ever find yourself doing a similar type of work – or any work at all, really – internationally, do yourself a favor and befriend a local expert(s) or community. Incorporating their knowledge and skill into your project will undoubtedly allow it to function much more effectively within its local context. While it is a skill to be mastered, do your best to listen to and truly appreciate their expertise without allowing your preconceptions and thoughts of the “appropriate” means of accomplishing a task to obstruct your understanding of the local approach. If you enter these conversations with an open mind, I guarantee you will learn new ways to improve your work and build lasting relationships. While the knowledge of local experts is certainly not yours to take without fair compensation and/or credit, I bet they’ll be wholeheartedly willing to share it, as we’ve come to find is the case here in Pitakele.
Step 2: Make a Plan – To get a sense of what a Sri Lankan tea garden looks like, I visited countless gardens throughout Pitakele and Kuduwa and, accompanied by Jo, toured an industrial plantation in the hill country outside of Kandy. The variety in gardening approaches is amazing. While the tea is usually planted in the same manner and with the same consistent spacing, various addendums can be made to the system to improve tea growth or incorporate other crops onto the land. Some tea gardens are edged with tall coconut trees. Others have vast areas of vetiva (Chrysopogon zizanioides) and guathamala (Tripsacum laxum) grasses, which are used to prepare the soil before expanding a tea garden onto a new patch of land. A variety of shade trees can be used in the system depending on soil quality and the cover needed to optimize the growth of the tea as a result of aspect and exposure.
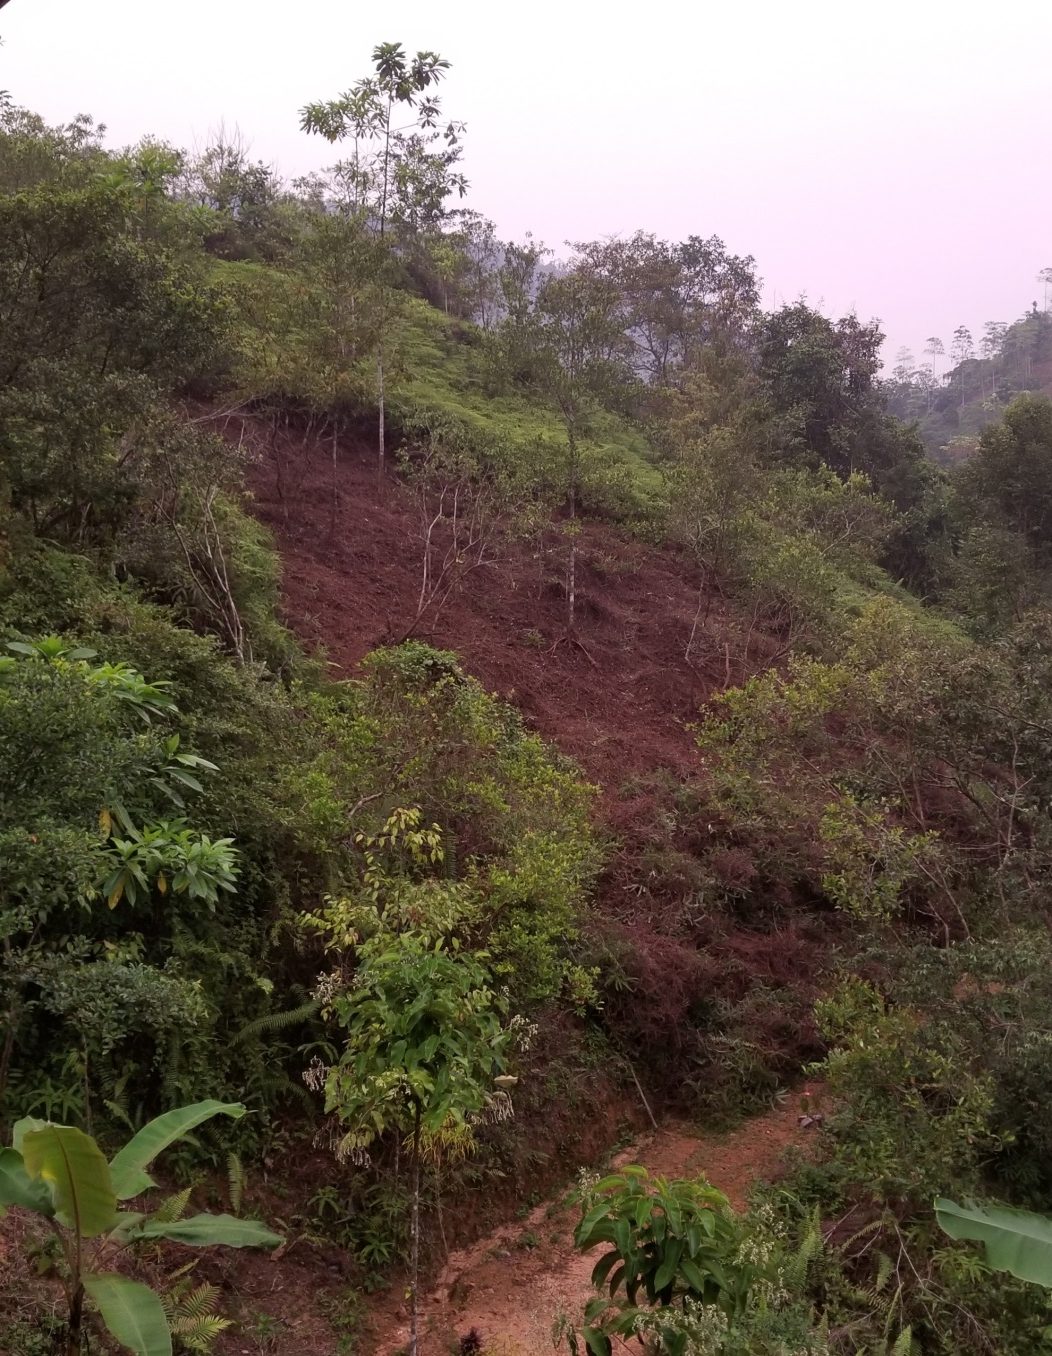
Our tea garden will be about a quarter acre in size. It will be situated on a steep slope (I’m guessing with between a 15% to 18% grade, but having to climb up and down hundreds of times may have introduced some bias) immediately adjacent the research station’s veranda, which will provide a great view for anyone relaxing outside. The slope faces roughly east and receives a lot of sun throughout the day. At the beginning of the project, the slope was fully covered in kekila fern, which requires a significant amount of labor to clear prior to planting. The soil is somewhat nutrient poor, shifting from a clay-rich organic layer to an iron-rich, sandy soil as one digs.
Once the kekila is removed, drainage ditches and retaining walls must be constructed to prevent unnecessary erosion and hold water more effectively in the sandy soil. Based on the size of the tea garden, Tillakaratne and I decided that 3 drainage ditches (measuring roughly three feet wide by three feet deep by seventy to one hundred feet long) would be appropriate, accompanied by four retaining walls (of roughly the same measurements).
I learned that 6,000 plants per acre is the ideal planting density in these tea systems. As a result, we’ve ordered 1,500 plants. They will be planted roughly two to three feet apart in rows that are also separated by two to three feet. Throughout the system, around 25 ladopa (Gliricidia sepium) trees will be planted at regular intervals to provide some shade to the young plants. These trees also serve as nitrogen fixers and their roots hold some additional moisture in the soil. Eventually, when the trunks reach about an inch in diameter, these trees will be pollarded, cut near hip height, leaving the tree forked, with only a couple of thin stems left to grow and shade the tea. Around these shade trees, we will plant gam miris (black pepper) and bulat (betel pepper),which will climb the ladopa, providing some additional leaf density and adding alternative crops to the system. Surrounding everything, I hope to also plant patches of cloves, but my ability to accomplish this will be slightly time dependent.
A miniaturized depiction of a section of the system is as follows:

Step 3: Feel the Controlled Burn – As I described in a previous post (“One-Month Update, Part I” from Monday, December 7), kekila fern is truly a beast to remove once it has established itself on a patch of land. It forms a sea of live weeds, a dense mass of dead fern, and a thick root mat that all must be removed before reaching the richer topsoil. Based on our past work with Tillekaratne, I assumed I knew the best way to remove this pest and wanted to get a jump on the work. So, I spent several days with a pehiya in hand, hacking away at the fern, rolling masses of weeds down the slope, and scraping dead plant matter away until I reached root (Fig. 1). I managed to clear about a sixth of an acre before Tilleka returned to the research station and looked at me like I was absolutely insane.
Apparently, this wholly manual approach to clearing fern is only appropriate when removing a small patch with necessary precision. On larger swaths, this method becomes far too labor intensive and time-consuming. Instead, Sri Lankans turn to fire to get rid of large areas of kekila.
We first cleared a ten- to fifteen-foot buffer around the area to be burned by hand. After getting rid of the live and dead fern layers, we used the udella (essentially an oversized hoe) to remove the root mat and expose the more fire-resistant soil. This buffer ensured that we wouldn’t light surrounding trees and brush ablaze (we are right next to a World Heritage site, after all).
In a tropical climate, several consecutive rain-free days are necessary to really light plant matter ablaze and to keep the fire going long enough to clear a large area. After several underwhelming attempts to ignite our somewhat soggy mats of fern with flaming coconut fronds, we were finally successful on our fifth rainless day (Fig. 2).
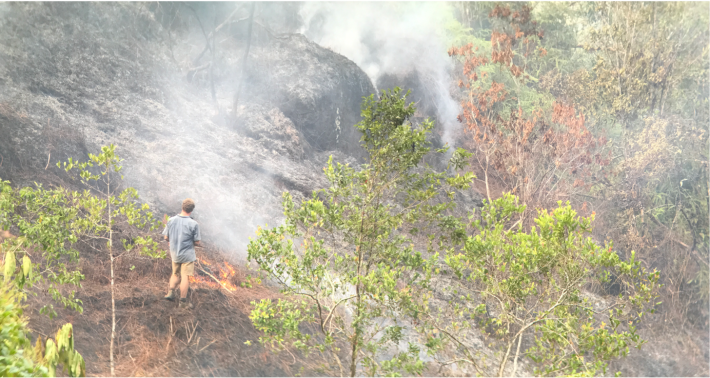
The fern went up spectacularly. A large blaze quickly consumed all the live fern. Small, crawling ground fires fueled by the low winds moving up the slope slowly crept through the remaining mats of dead plant matter. Eventually, the entire slope was cleared down to the root mat, leaving only a black, dusty char as evidence of the vast swaths of greenery there only a few days prior.
Step 4: Scrape, Hack, Pull, Peel – The next step was by far the most mind-numbing and tedious, so I’ll try not to bore you with too many details. The kekila root mat, sometimes reaching a thickness of up to six inches, requires some serious elbow grease to eradicate. It situates itself fully into the upper reaches of the topsoil and is very difficult to remove. And it covered the entirety of the area we needed to clear.
Because of a slight motorcycle mishap, Tilleka was unable to help me with this step, so I had the pleasure of peeling away the furry, hide-like mat from the entirety of the slope myself (thank you, Pod Save America for keeping me entertained and sane throughout this process). This step required using the udella to slice large rectangles into the root mat, then peeling the roots away from the soil. With the help of gravity, the root mat will usually roll itself into a long, cylindrical tube (in my head, I call them “root roll-ups” after the popular, sugar-based “fruit” snack, beloved by grandmothers and ‘90s kids everywhere), which you can force down the steep slope to collect at the bottom of the hill. All in all, this process took me roughly a week of consistent solo work.
If there is a more enjoyable way to spend your time in a tropical island nation, I am unaware of it.
Step 5: Dig and Stack – With Tillekaratne back in action, we then began the next stage of the process: digging drainage ditches and constructing small retaining walls to prevent sodan yanawa (erosion). To start, Tilleka placed a notch into a stick, roughly three feet from its end. Using a rope and stakes, we established the perimeter of our first planned drainage ditch at the very top of the tea garden. The notched stick was to confirm that we plotted a consistent three-foot width across the entire length of the planned ditch. It was also later used to ensure that we dug at least three feet in depth from the top of the lower edge of the ditch throughout.
Before ditch digging could commence, we first needed to construct a retaining wall below to prevent all of our freshly dug soil from collecting all the way at the bottom of the hill. Immediately above the strip designated to be our second drainage ditch, we notched a shelf into the soil, roughly one foot deep, two feet wide, and extending the full extent of the slope. After unraveling several of our root roll-ups, we cut out long rectangular strips of root mat with the udella and used them as the building blocks of our retaining wall. Each wall eventually reached a few feet in height, which required around four to six layers of root mat to achieve. To increase stability, we made sure to leave a few inches of space between the new root walls and the soil “shelf,” which we later packed with small rocks and soil.
Prior to digging the ditch, it was important to establish a strong edge to ensure stability. Using a long, heavy steel rod with a flat head, we followed our rope perimeter and cut the boundaries of our ditch into the earth. Then, with udellas and pick-axes, we removed rock and soil until our ditch was roughly three feet in depth, cleaning up the edges with the steel rod as we progressed. For Tilleka, this occasionally meant that, while standing in a ditch, the adjoining retaining wall we constructed sometimes reached well above his shoulders.
We repeated this laborious process until all three of our drainage ditches and all four of our retaining walls were constructed. After raking away unwanted root balls, deconstructing some untidy humps, and filling in hallows and uncovered coconut holes, site prep was officially complete!
Step 6: Cleanup
Having cleared the fern and fully prepped the land for planting, all that remains is some light cleanup before our plants arrive at the research station. This will mostly involve cutting down some of the unwanted, scraggly trees casting undue shade on the slope and harshening the aesthetics of the garden. I’ll also remove the remaining root mats currently resting below our last retaining wall at the bottom of the hill and those in the road leading to the veranda.
(2/19/2018 Update: this work is now finished. Huzzah!)


